Homemade Reese’s Cups with Sea Salt
Highlighted under: Whisked Wonders
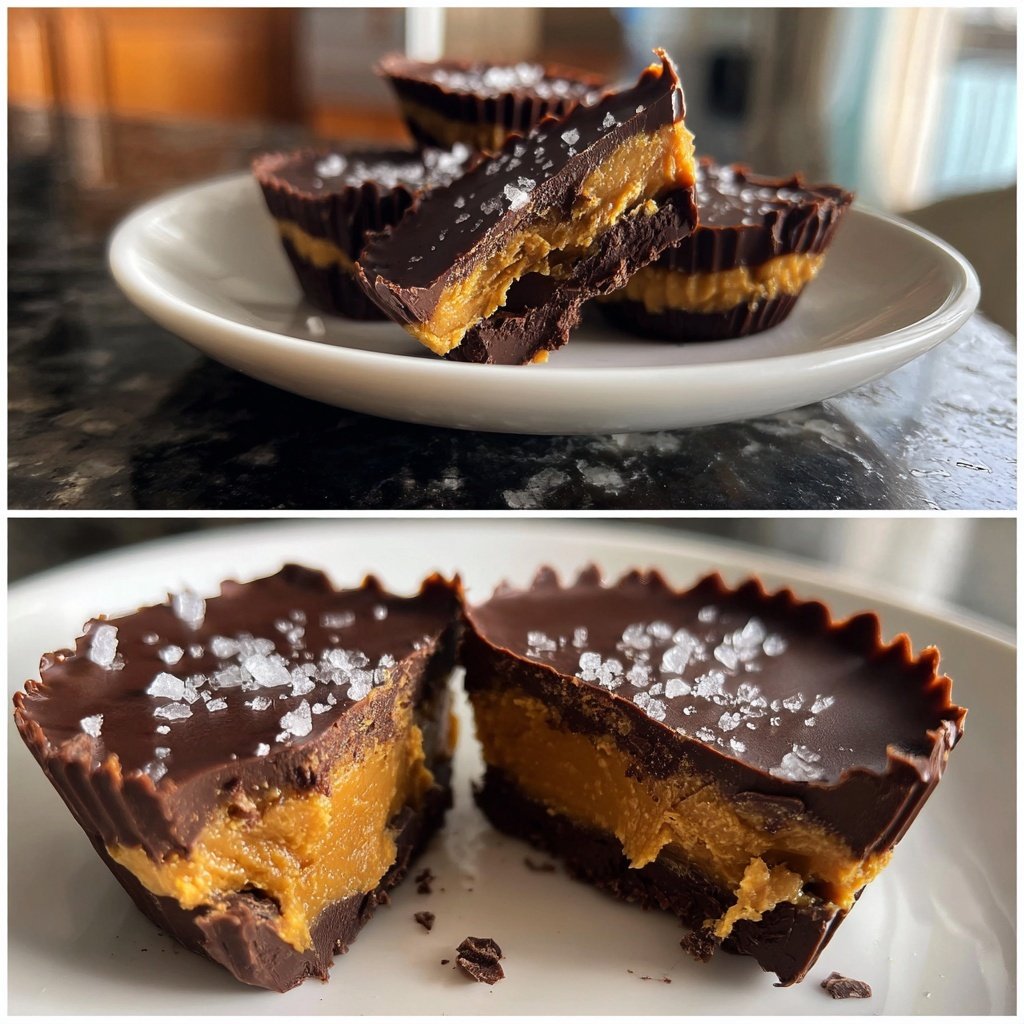
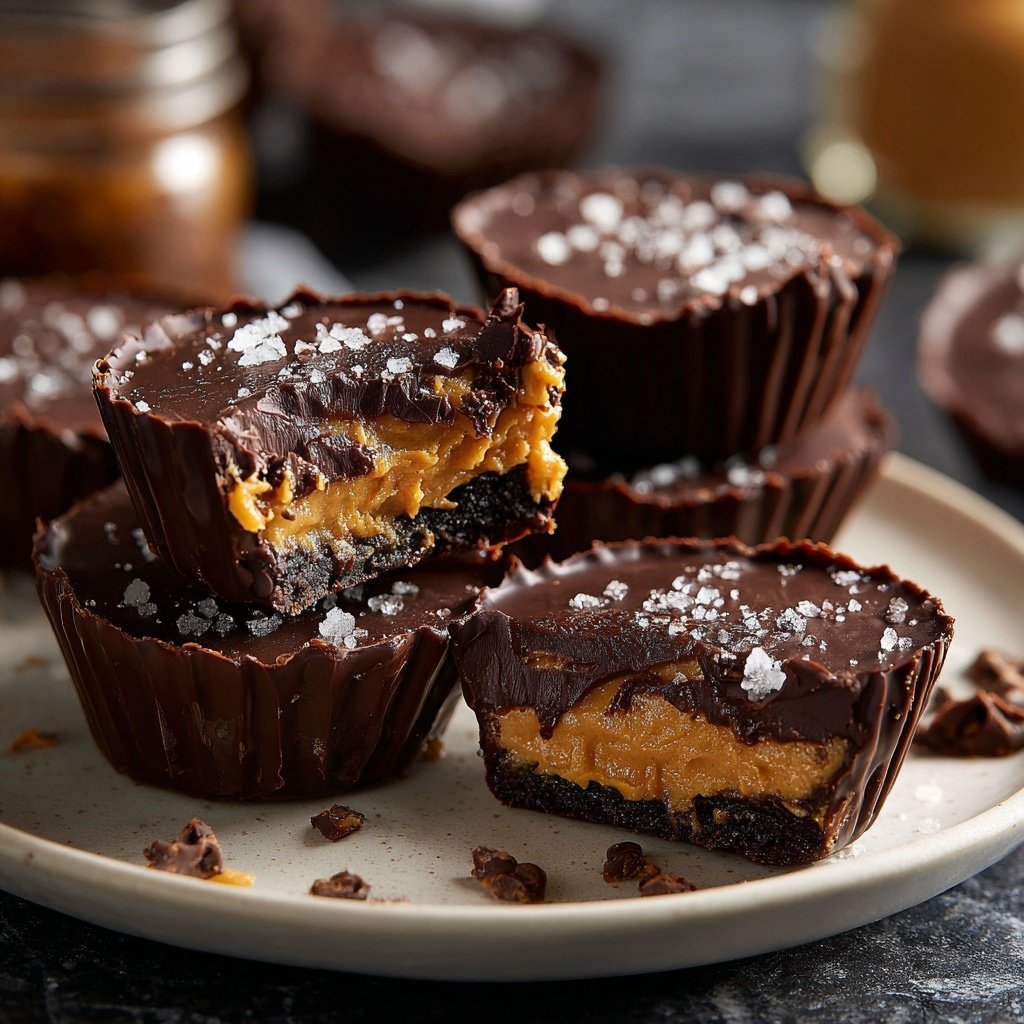
I absolutely love making my own Reese’s Cups at home, and the addition of sea salt elevates the experience to a whole new level. The combination of creamy peanut butter and silky chocolate creates a treat that's hard to resist. It's a simple process, but the flavors are extraordinary. Every bite is a delightful surprise with the crunch of the salt against the sweetness. From the first time I made these, I knew they would become a staple in my kitchen, perfect for any occasion or just a sweet indulgence for myself.
Creating homemade Reese’s Cups has been one of the joys of my kitchen adventures. I found that using high-quality chocolate and natural peanut butter truly makes a difference in flavor. The process is straightforward, but the outcome feels gourmet. After testing different types of chocolate, I discovered that semi-sweet chocolate provides the perfect balance with the sweetness of the peanut butter.
One little trick I’ve incorporated is sprinkling just a touch of sea salt on the top before the chocolate sets. This makes all the difference, enhancing the overall flavor profile wonderfully. Each bite showcases this delightful contrast, making these cups irresistible!
Why You Will Love This Recipe
- Rich chocolate flavor paired with creamy peanut butter
- A delightful surprise of sea salt enhancing sweetness
- Simple to make and perfect for sharing or indulging
The Art of Melting Chocolate
Melting chocolate can be tricky, but with the right technique, you can achieve a silky-smooth texture. When melting chocolate chips in the microwave, it's crucial to use short bursts of heat—typically 30 seconds—followed by stirring. This helps prevent the chocolate from seizing up, which happens if it's overheated. If you notice any lumps remaining after stirring, continue to heat in 10-second intervals until completely melted and glossy.
Using a microwave-safe bowl is important to avoid any chemical reactions with other materials. You can also opt for a double boiler method on the stovetop if preferred. Just make sure the bowl fits snugly over the pot without touching the water, and keep the heat low to prevent direct contact with flames. This gentle approach helps maintain the chocolate's temper, ensuring a smooth texture.
Perfecting Peanut Butter Filling
When mixing the peanut butter filling, use a creamy peanut butter for the best consistency. The addition of powdered sugar not only sweetens but also thickens the mixture, making it easier to scoop and layer on top of the chocolate. If you prefer a less sweet filling, you can reduce the powdered sugar by half, or opt for natural peanut butter varieties that have no added sugar, allowing the heat of the chocolate to balance the flavor.
Incorporating sea salt into the peanut butter mixture elevates the flavor profile, contrasting beautifully with the sweetness of the chocolate. If you're feeling adventurous, try adding a pinch of cinnamon or a drop of vanilla extract into the filling for an unexpected flavor twist. These subtle alterations can make a big difference in the overall taste experience.
Storage and Make-Ahead Tips
These homemade Reese’s Cups can be made ahead of time and stored to enjoy over several days. Once set, place the cups in an airtight container and store them in the refrigerator, where they will remain fresh for up to a week. If you're looking to keep them for longer, consider freezing them. Just ensure they are well-wrapped or in a freezer-safe container to avoid any freezer burn, allowing for up to three months of storage time.
When you're ready to enjoy your frozen cups, simply transfer them to the refrigerator to thaw for a couple of hours before serving. They will become perfectly creamy again, just like fresh. For an added touch, consider pairing these cups with a cold glass of milk or warming a few in the microwave for a few seconds, letting the chocolate become slightly gooey for an indulgent treat.
Ingredients
For the Cups
- 1 cup semi-sweet chocolate chips
- 1 cup milk chocolate chips
- 1 cup creamy peanut butter
- 1/4 cup powdered sugar
- 1/4 teaspoon sea salt
Add a pinch of love!
Instructions
Melt the Chocolate
In a microwave-safe bowl, combine the semi-sweet and milk chocolate chips. Heat in the microwave for 30-second intervals, stirring in between until fully melted.
Prep the Muffin Tin
Line a muffin tin with cupcake liners. Pour a tablespoon of melted chocolate into each liner, spreading it to cover the bottom. Place in the refrigerator to set.
Make the Peanut Butter Filling
In another bowl, mix the peanut butter, powdered sugar, and sea salt until smooth. Remove the chocolate from the fridge and add a spoonful of the peanut butter mixture on top of the chocolate in each liner.
Top with More Chocolate
Cover the peanut butter layer with the remaining melted chocolate, ensuring the peanut butter is completely sealed. Return to the refrigerator to set for about 15 minutes.
Enjoy!
Once set, remove from the muffin tin and sprinkle a little extra sea salt on top if desired. Your homemade Reese’s Cups are ready to enjoy!
Let the indulgence begin!
Pro Tips
- For an extra twist, try adding crushed pretzels to the peanut butter mixture for a delightful crunch.
Troubleshooting Melting Issues
If you find your chocolate isn't melting smoothly and has a grainy texture, it may have been overheated or come into contact with water. Avoid this by ensuring all bowls and utensils are completely dry before use. If you encounter this problem, you can salvage the chocolate by adding a small amount of vegetable oil—start with a teaspoon—to help regain a smoother consistency.
Another common issue is the chocolate hardening too quickly when poured over the peanut butter. To mitigate this, make sure all your components are at room temperature before assembly. If you work with cold chocolate, it may seize when coming into contact with the warmer peanut butter filling.
Creative Variations
To switch things up, consider incorporating other nut butters such as almond or cashew as a unique alternative to peanut butter. These nut butters bring their own distinct taste profiles while maintaining that creamy texture that pairs wonderfully with chocolate. Just ensure the nut butter you use is smooth to avoid graininess in the finished product.
You can also experiment with different types of chocolate; for instance, using white chocolate for a sweeter, milky flavor or dark chocolate for a richer, more intense taste. Mixing in flavors such as mint or orange zest can provide an exciting twist to the classic recipe, allowing you to create seasonal variations for holidays or personal preferences.
Questions About Recipes
→ Can I use dark chocolate instead?
Absolutely! Dark chocolate adds a richer flavor and pairs wonderfully with the peanut butter.
→ How long do these homemade cups last?
They can last for up to two weeks when stored in an airtight container in the refrigerator.
→ What can I substitute for powdered sugar?
You can blend regular granulated sugar into a fine powder as a substitute in this recipe.
→ Is it possible to make these vegan?
Yes! Use dark chocolate that is dairy-free and a plant-based peanut butter for a vegan-friendly option.
Homemade Reese’s Cups with Sea Salt
What You'll Need
For the Cups
- 1 cup semi-sweet chocolate chips
- 1 cup milk chocolate chips
- 1 cup creamy peanut butter
- 1/4 cup powdered sugar
- 1/4 teaspoon sea salt
How-To Steps
In a microwave-safe bowl, combine the semi-sweet and milk chocolate chips. Heat in the microwave for 30-second intervals, stirring in between until fully melted.
Line a muffin tin with cupcake liners. Pour a tablespoon of melted chocolate into each liner, spreading it to cover the bottom. Place in the refrigerator to set.
In another bowl, mix the peanut butter, powdered sugar, and sea salt until smooth. Remove the chocolate from the fridge and add a spoonful of the peanut butter mixture on top of the chocolate in each liner.
Cover the peanut butter layer with the remaining melted chocolate, ensuring the peanut butter is completely sealed. Return to the refrigerator to set for about 15 minutes.
Once set, remove from the muffin tin and sprinkle a little extra sea salt on top if desired. Your homemade Reese’s Cups are ready to enjoy!
Extra Tips
- For an extra twist, try adding crushed pretzels to the peanut butter mixture for a delightful crunch.
Nutritional Breakdown (Per Serving)
- Calories: 210 kcal
- Total Fat: 16g
- Saturated Fat: 5g
- Cholesterol: 0mg
- Sodium: 80mg
- Total Carbohydrates: 18g
- Dietary Fiber: 1g
- Sugars: 10g
- Protein: 5g