Valentines Snacks Mini Dessert Cups
Highlighted under: Whisked Wonders
I love celebrating Valentine's Day with sweet treats, and these mini dessert cups are a perfect way to show affection without overwhelming your loved ones. Each cup is filled with layers of creamy goodness and delightful toppings that make them both beautiful and delicious. They’re easy to assemble and can be customized based on preferences, making them a fun project for both kids and adults. The vibrant colors and flavors really capture the spirit of the day, ensuring everyone feels the love with each delightful bite.
When I first created these mini dessert cups, I wanted a sweet treat that felt special but could be made without fuss. The combination of layers makes each cup look elegant, yet they require only basic ingredients. I found that using clear cups not only highlights the colorful layers but also adds a playful touch to our Valentine’s gathering.
One tip I discovered is to let the layers set slightly before adding the next one. This makes for cleaner lines and a more appealing look, which I think elevates these treats from simple snacks to eye-catching desserts. Everyone loved customizing their cups, creating a personalized experience for each guest!
Why You Will Love These Mini Dessert Cups
- Perfectly portioned for individual enjoyment.
- A delightful mix of textures from creamy to crunchy.
- Visually stunning, making them great for sharing on special occasions.
Tips for Layering Your Dessert Cups
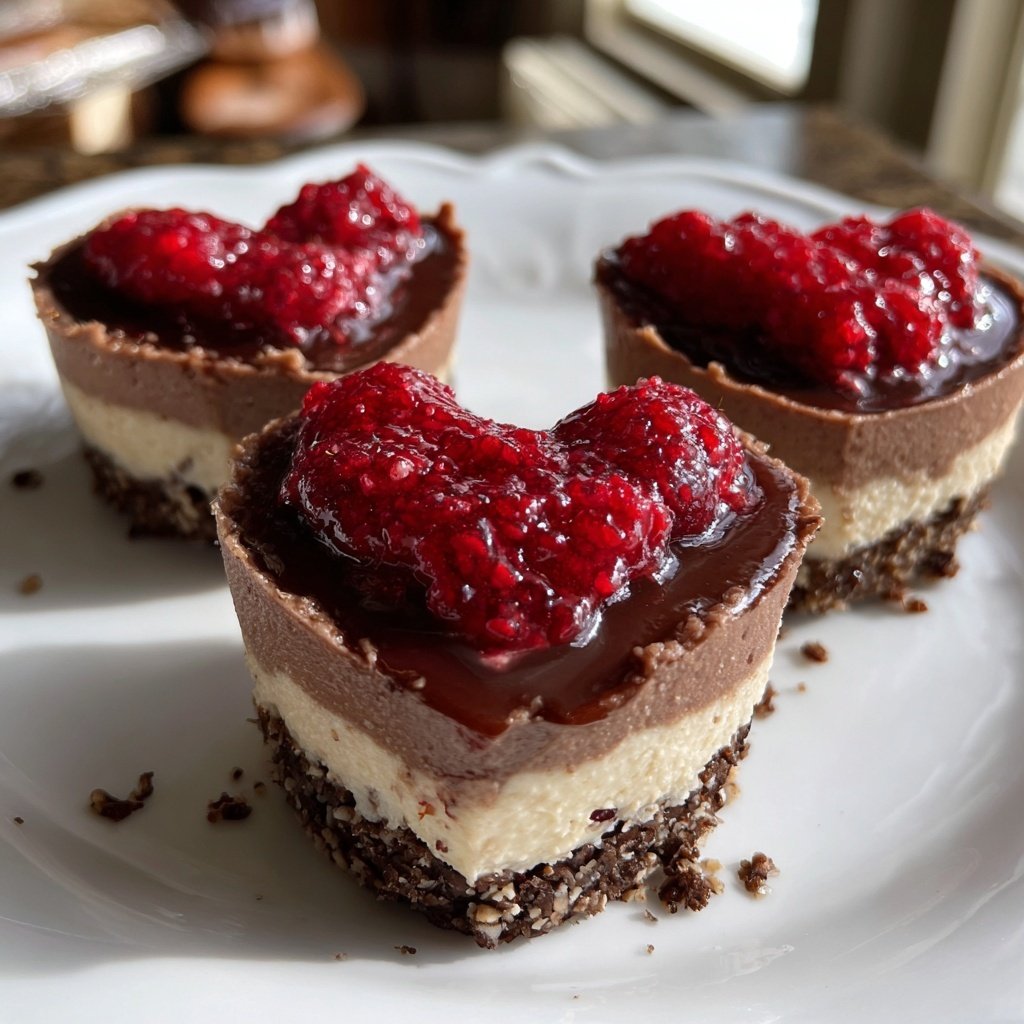
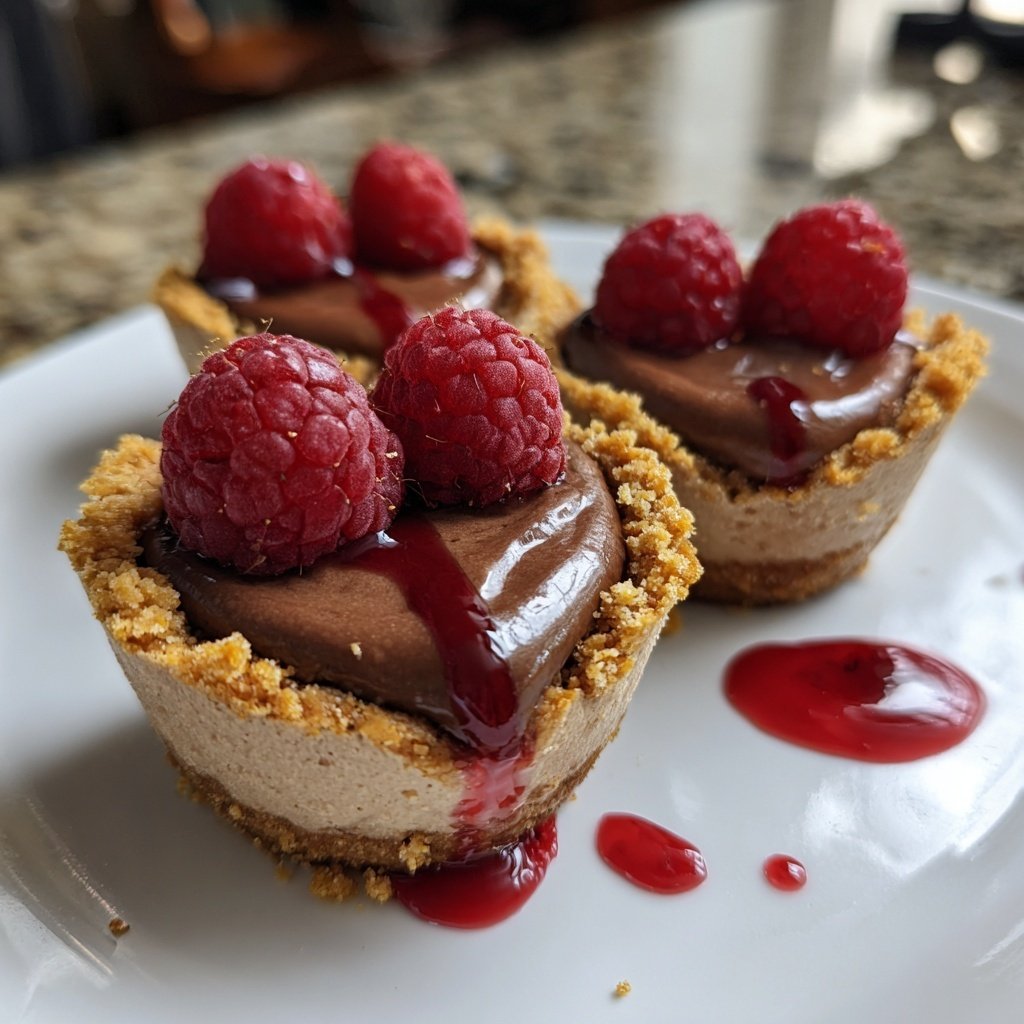
Layering is key to achieving the perfect balance of flavors and textures in your mini dessert cups. Start with a good layer of cookie crumbs that will serve as a sturdy base; this not only adds crunch but also helps support the creamy layers above. A tip I recommend is to use a small glass or a transparent plastic cup to enhance the visual appeal. This way, the beautiful layers will be visible to everyone, making them even more enticing.
To ensure each layer holds up well, make sure the cream mixture is adequately whipped. It should be fluffy, yet thick enough to hold its shape without collapsing into the crumb layer. If your mixture seems too runny, consider whipping it a bit longer or adding a touch more cream cheese to achieve a more stable texture. This will prevent the layers from merging and ensure a pleasant balance with each bite.
Choosing the Right Toppings
The toppings for your dessert cups can elevate them to another level visually and flavor-wise. Fresh berries like strawberries, blueberries, or raspberries not only add a pop of color but also provide a pleasant tartness to contrast the sweetness of the cream. If you have access to edible flowers, they make an exquisite garnishing option that can impress your Valentine further. Just be sure to wash them carefully before adding them as a decoration.
For a textural twist, consider adding a sprinkle of crushed nuts, chocolate shavings, or even a drizzle of caramel or chocolate sauce. These elements can complement the creaminess of the dessert while adding additional flavor layers. I personally enjoy adding a few mini chocolate chips on top for an extra indulgent touch—they create a fun crunch that pairs beautifully with the smooth cream.
Make-Ahead and Storage Tips
These mini dessert cups are perfect for make-ahead treats, allowing you to prepare them a day in advance. Just assemble the cups fully and store them covered in the refrigerator. I suggest preparing the cookie base and cream mixture separately if you're planning to store them for more than a day to keep the layers from getting soggy. Simply layer them right before serving to preserve the dessert's intended texture.
If you end up with leftover cups, they can be stored in the fridge for 2-3 days. However, for best results, consume them within the first day or two to maintain the optimal creaminess. If you're planning to serve them at a later date, consider freezing the layers separately, as the cream mixture can be frozen for about a month. Just remember to allow it to thaw in the refrigerator before reusing.
Ingredients
- Make sure to gather your ingredients before starting for a smoother assembly process.
For the Cups
- 1 cup of whipped cream
- 1/2 cup of cream cheese
- 1/4 cup of powdered sugar
- 1/2 teaspoon of vanilla extract
- 1 cup of crushed cookies (like Oreo or graham crackers)
- Fresh berries for decoration
Feel free to get creative with the toppings—use chocolate chips, sprinkles, or even a drizzle of chocolate sauce!
Instructions
- Prepare your workspace by laying out all your mini cups and the ingredients.
Make the Cream Mixture
In a bowl, blend the whipped cream, cream cheese, powdered sugar, and vanilla extract until smooth and creamy.
Layer the Cups
Begin by placing a spoonful of the cookie crumbs at the bottom of each cup, followed by a layer of the cream mixture. Repeat until you fill each cup, finishing with a layer of cream.
Add Toppings
Top each dessert cup with fresh berries or any of your favorite toppings, creating a colorful presentation.
Chill and Serve
Refrigerate the cups for at least 30 minutes before serving to allow the flavors to meld.
These cups can be made ahead of time, making them a great stress-free option for your Valentine’s celebration!
Pro Tips
- Try experimenting with different flavors of cream or adding a dash of liqueur if serving to adults for a more sophisticated taste.
Flavor Variations
While the classic combination of cream cheese and whipped cream creates a luscious base, you can experiment with other flavors to personalize your dessert cups. For a citrusy twist, try adding a bit of lemon or orange zest into the cream mixture. It brightens the flavor and can make your dessert feel more refreshing—ideal for warmer weather or a fresh take on the traditional recipe.
Another variation involves incorporating different extracts like almond or coconut into the cream mixture for a unique flavor profile. You could even blend in some melted chocolate to create a chocolate mousse-style layer, adding richness that pairs beautifully with crushed cookies and berries.
Troubleshooting Common Issues
If you find that your whipped cream isn't achieving the desired fluffiness, it may be due to the cream being too warm. Ensure your heavy cream is very cold before whipping, as this helps it hold air better. Additionally, if you're using a hand mixer, some models are less powerful than others. If you’re struggling, a stand mixer might be a worthwhile investment for achieving that perfect whipped cream consistency.
In the event your mixture becomes too sweet due to additional toppings or sweetened cookie crumbs, consider balancing it with a pinch of salt or a splash of lemon juice. Even a little acidity can drastically improve the overall flavor and create a well-rounded experience with each bite.
Questions About Recipes
→ Can I make these dessert cups in advance?
Yes! They can be made up to a day in advance and kept in the refrigerator until you’re ready to serve.
→ What alternative toppings can I use?
You can use any toppings you like! Consider chocolate shavings, nuts, or even small candies for added crunch.
→ Can I substitute the cream cheese?
Absolutely! You could use Greek yogurt or a plant-based alternative to make them lighter.
→ How long do these mini cups last in the fridge?
They are best enjoyed within 2-3 days, but can last up to a week if kept sealed and refrigerated.
Valentines Snacks Mini Dessert Cups
Created by: Katherine Blake
Recipe Type: Whisked Wonders
Skill Level: Beginner
Final Quantity: 12 mini cups
What You'll Need
For the Cups
- 1 cup of whipped cream
- 1/2 cup of cream cheese
- 1/4 cup of powdered sugar
- 1/2 teaspoon of vanilla extract
- 1 cup of crushed cookies (like Oreo or graham crackers)
- Fresh berries for decoration
How-To Steps
In a bowl, blend the whipped cream, cream cheese, powdered sugar, and vanilla extract until smooth and creamy.
Begin by placing a spoonful of the cookie crumbs at the bottom of each cup, followed by a layer of the cream mixture. Repeat until you fill each cup, finishing with a layer of cream.
Top each dessert cup with fresh berries or any of your favorite toppings, creating a colorful presentation.
Refrigerate the cups for at least 30 minutes before serving to allow the flavors to meld.
Extra Tips
- Try experimenting with different flavors of cream or adding a dash of liqueur if serving to adults for a more sophisticated taste.
Nutritional Breakdown (Per Serving)
- Calories: 210 kcal
- Total Fat: 14g
- Saturated Fat: 8g
- Cholesterol: 35mg
- Sodium: 120mg
- Total Carbohydrates: 22g
- Dietary Fiber: 1g
- Sugars: 10g
- Protein: 3g